
Ultrasonic Sensor Project #1
In this lesson you will learn to set up an ultra sonic sensor and program it to sense the distance of objects. Follow the instructions in the slide tutorial below. You will need to add two 10k resistors between each ground and LED bulb. Don Not forget this!
| ultrasonic1b.pdf |
Extension- What is the measurement in centimeters to the safe zone? Next, change the code until the safe zone activates at 1 meter. Use a meter tape to measure. Let teacher know when you get it to measure 1 meter. Go back to the code and see what the speed of sound is. Realize that that the sensor is converting the speed of sound into cm. Look up the speed of sound on Google.
Ultrasonic Sensor Project #2
Ultrasonic Sensor Project #3 Combining two different project codes to make the Ultrasonic Sensor do a different thing when triggered by an object.
In this project you will make the Ultrasonic Sensor play a song when a distance of 40 cm is reached. You will see how 2 different project codes can be combined to do a different function.
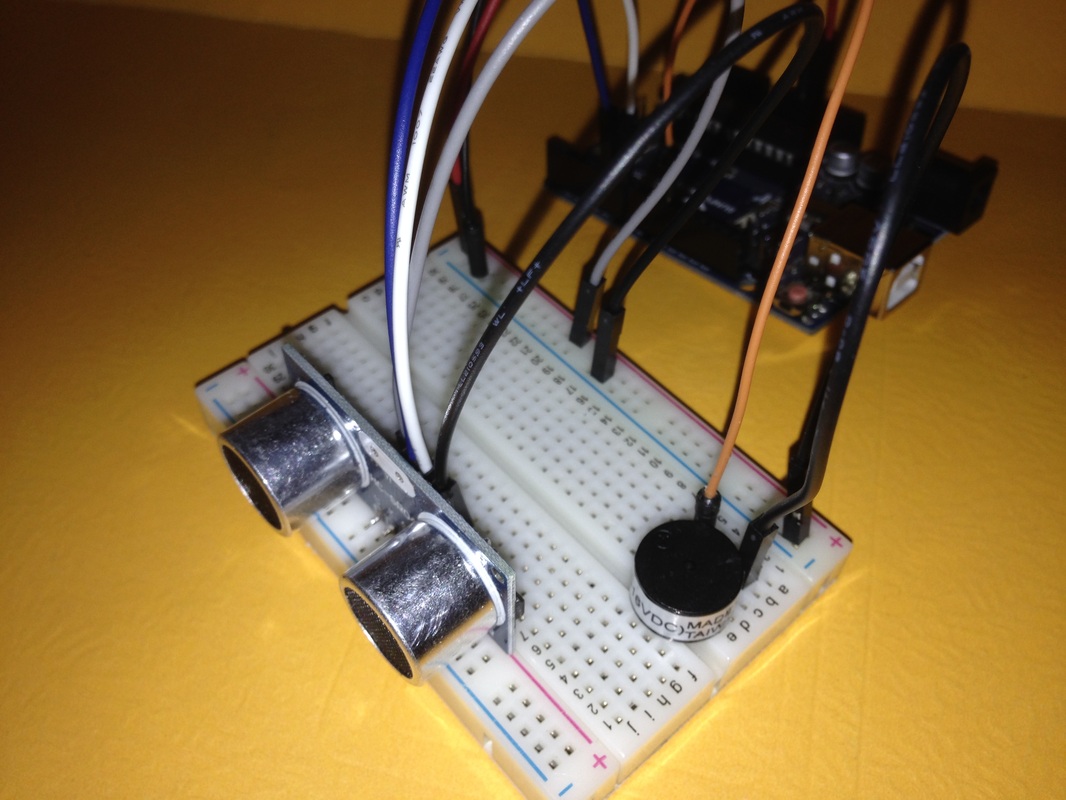
Use similar configuration as the previous project.
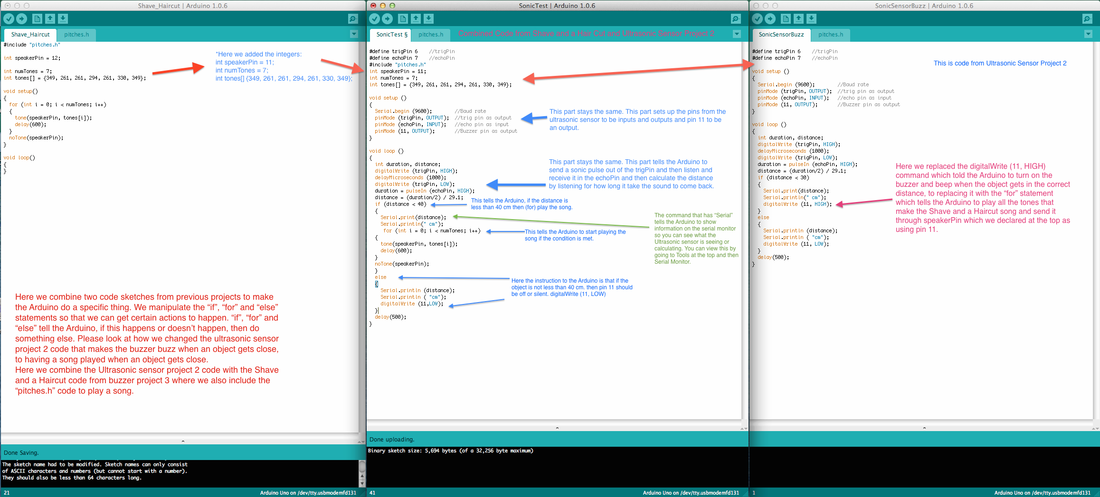
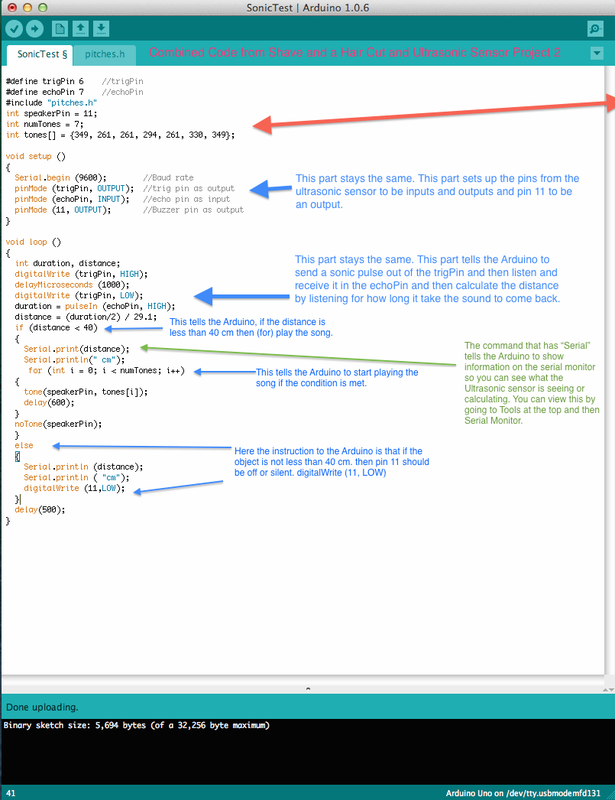
Please take the time to study all the notes that have been written so you can understand how this program works and how we combined 2 different project codes. (Click on the picture to Enlarge)
|
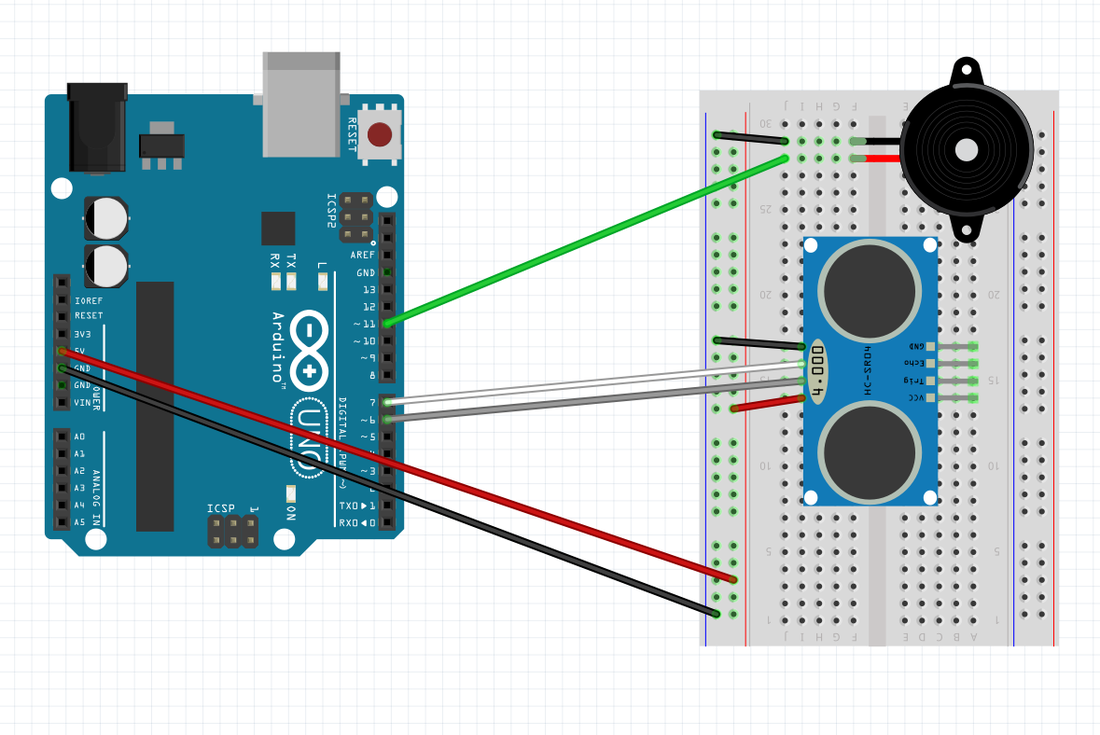
Click on the picture to enlarge. Use similar wiring configuration as previous project.
Copy This One for this Project.
|
The video below give some instruction on how you might combine two different Arduino Codes into one to do a new project.
Project #4 Ultrasonic Sensor with Lights and Melody (Proximity Alarm)
In this project you will learn how to combine the Ultrasonic sensor with LED's and a Piezo speaker to make a proximity alarm that triggers a red light and melody when you come to close to the sensor. Here you will combine the codes from the previous ultrasonic sensor projects. Follow the schematic closely to wire the device correctly. Copy the code and make sure you double check the code for mistakes.
