
Arduino Servo Project #1 - Sweep Back and Forth
Arduino Servo Project #2 - Centering at 90 degrees
In this activity you will center the arm at 90 degrees. Follow the images below. Image 1 gives you a general understanding of how a servo is attached to the Arduino. Image 2 shows how to attach jumpers to a servo that has a connector. Image 3 describes the code used to center to 90 degrees. After you have centered to 90 degrees, check with a protractor to see if it is at 90 degrees. Then modify the code to center at 45 degrees and then at 179 degrees. Each time check with with protractor for accuracy.
Arduino Servo Project #3 - With Potentiometer Control
In this activity you will control a servo with a potentiometer or knob. Follow the instructions and images below.
Arduino Servo Project #3 - Control 2 Servos with 2 Knobs.
Arduino Servo Project #4 - Control 3 Servos with 3 Knobs.
Add a third servo and third potentiometer to the last activity. Modify the code to add another of each. .
Arduino Servo #5 - Alternate Sweep Back and Forth
Use this alternative code to make the Servo sweep back and forth. Wire up your servo as in Project #1. Then use this code to make the servo sweep 90 to 180. Then change it to sweep from 0 to 180. Then change the delayTime to make the sweep go faster or slower. This will be the basis for the bugbot. Later you will learn to include a second servo entry into the code for two servos to work at the same time.

Arduino #6 - Servo controlled by Button
In this activity you can program a button to control the movement of a servo when the button is pushed. This program uses conditional statements that tell the servo IF the button is "off" or "LOW" then do something, Else (otherwise) do something else. You could create a project where the button controls the servo opening a lid or door.

|
Checkpoint Gate - With Servo & Potentiometer and LED's |
|
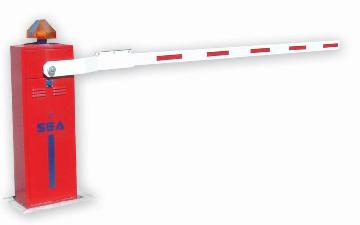
Application - Construct a Checkpoint gate controlled by a potentiometer, like the one shown in the picture. Add a red and green light to indicate when the gate is closed and when it is open.
Use the code for the single servo and potentiometer. Add code to include the green light when at a certain angle and code to trigger a red light when at the closed angle. You may want to look at other code that contains an "if" statement and a "while" statement. |
|
