

|
The Physics of Sound - Building Background Knowledge |
|
Day 1 - Watch video and write down any questions you may have. Think about what the process that makes sound happen. What do you think? Also write down any important terms or words used to describe the Physics of Sound.
|
Day 1 - Watch video and write down any questions you may have (if different from previous movie.) What do you think? Also write down any important terms or words used to describe the Physics of Sound.
|
|
|
|
Reading Selection

|
| ||
Vocabulary Activity
Review some vocabulary related to our study of the physics of Sound.
How does a wind instrument work?
|
|
|
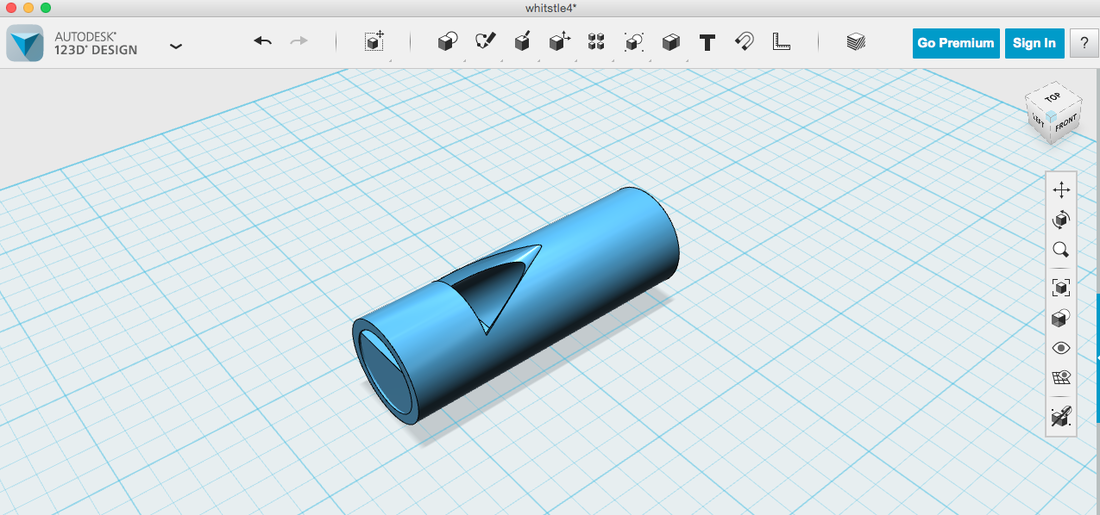
Day 3 - Watch each video to see how a small toy whistle or flute works. Take notes or draw a picture of the toy whistle produced in this video if necessary. Drawing may help you as you begin to design your own whistle using the 123D Design app.


Shell Tool
|
3D Printing a Toy Whistle - Applying the Physics of Sound (Day 3-8)After seeing the videos, use the software application 123D Design to create a toy whistle.
* Measure your toy whistle to be a length of approximately 40 mm to 50 mm long. A Diameter of 10 mm to 15 mm. * You will need to start with the cylinder shape. * Hollow out your cylinder but leave one end closed. Make the wall thickness at least 1 mm but not more than 1.5 mm. Use the shell tool to hollow out your cylinder. * Try to figure out how to make the diagonal cut on the cylinder. Hint: cone * For identification, try to add your initials somewhere on the whistle. Use the text tool and push/pull tool to place raised letters of your initials. * Be Sure to review the videos for clues related to vibration. |
***When you complete your model on 123D, first save it to your computer. Then export it as an STL file. Make sure you tell the teacher when you are ready to have it printed on the 3D Printer.
|

|
Testing Your Product
|
***After you have printed your whistle, test it and use the online app "Simple Tuner" find the pitch (musical note) that is played by your whistle. Compare your pitch with another students. If it is different, write down on your activity sheet why it is different.
|
Click on the button to take you to the simple chromatic tuner.
|
Project Summary

|
When all is complete, use the Comic Life to create a Project summary/reflection that details the learning process that you took to complete this activity and anything you learned about the process. See the example to the left.
|
