
Project #1 - It's Raining - It's Pouring
1. Find picture you want to use. If you can't find a black and white, then convert a color image to black and white by going to Colors> Desaturate> and select a setting.
2. Make a new layer. Call it Rain.
3. Then go toTools > Default Colors and now go to Edit > Fill with FG Color to fill the layer with solid black.
4. Go to Filters > Noise > RGB Noise and uncheck Independent RGB so that the three color sliders are linked.
5. Make sure all the Red Green Blue sliders are set to .79 and the Alpha slider is set all the way to the left. Click ok.
6. Next go to Filters > Blur > Motion Blur to open the Motion Blur dialog. Ensure that the Blur Type is set toLinear. Set the Length to forty and the Angle to eighty.
7. Use the scale tool to overlap the edges of the image.
8. Change the Mode on the dropdown menu in the Layers palette and change the Mode to Screen.
9. Go to Colors > Levels and check that the Linear Histogram button is set and that the Channel dropdown is set to Value.
10. Adjust the levels by moving the small black, grey and white triangles left and right, until you get the desired rain effect.
11. Next go to Filters > Blur > Gaussian Blur and you can experiment with the Horizontal and Vertical values
Project #2 - Create A Planet
1. Start with a new transparent layer that is 1024 x 764.
2. Using the Ellipse tool (circle) make a medium sized circle.
3. Go to Filters>Render>Clouds>Plasma and set the turbulence to 0.5.
4. Make sure you are viewing image at 100%.
5. Then go to Filters>Distorts>iWarp
6. Choose Swirl CCW and click on the area you want to swirl. Make a few swirls hear and there to make it look more like a gassy planet. You can also change the setting to swirl CW. Click OK when you like what you've done. Be careful because you can over do it. Don't set the deform setting very high.
7. You can leave the color as is or you can change the color by going to Colors>Colorify and experimenting with the different colors.
8. Make a new layer called planet 2 and repeat the process with a smaller planet until you finish step 2.
9. Then select the paint bucket tool. Click on the foreground square to change the color. Use the new window to select a new color. Click OK. Then click your paint bucket tool inside the new circle. Your circle should fill with the new color.
10. Next go to Filters>Render>Clouds>Fog. Then move the sliders until you get the look you want. Click OK.
11. Make a new transparent layer. Call it Planet 3.
12. Using the Ellipse tool make another smaller circle. Fill with a color using step 9.
13. Next go to Filters>Render>Lava. Change your seed and size to 5 and roughness to 7. Then click OK.
14. Make a new layer and call it Space and move it to the very bottom on the layer palette.
15. Then go to where you choose color, on the upper left. Make sure the top square is black. To change it, double click on the top square. Then select black.
16. The go to Edit>Fill with FG Color. That layer should fill with black.
17. Finally add a star somewhere in the picture. While on the space layer, go to Filters>Light and Shadow>Supernova, Drag the shinny star where you want it to appear. and click Ok. You should have a new bright star. Undo it and Adjust it if you don't like it.
Project #3 - Snake Eyes
For Fun, add two fangs. You will need to make a transparent layer. Then use the free select tool to make the fangs and fill them in with white.
http://www.youtube.com/watch?v=St3S4PuOkko
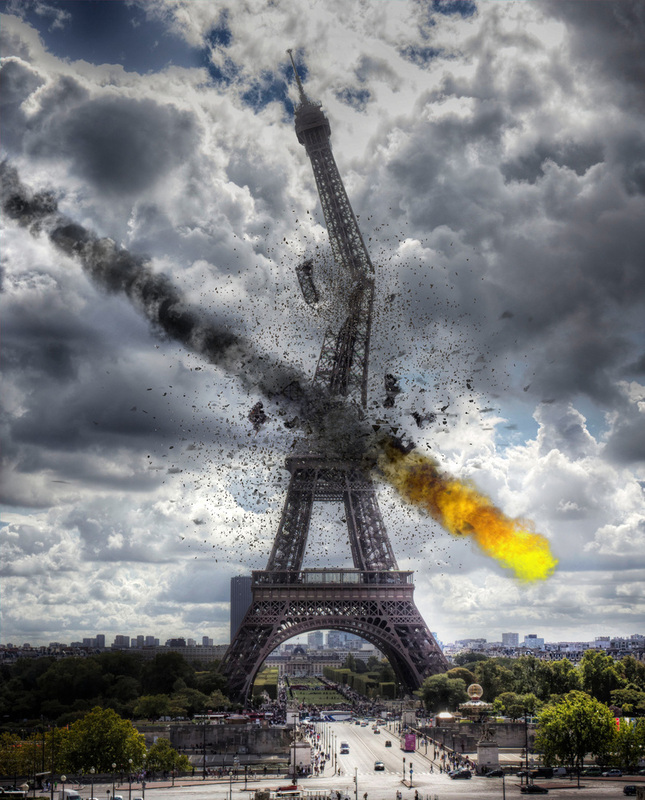
Project #4 - The World is Ending!
http://gimp.pixtuts.com/gimp-tutorials/photo-effects/retro-rough-color-photo-effect
Project #5 - Lizard Scales
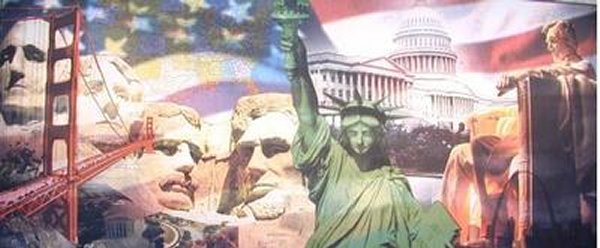
Project #6 - Themed Photo Montage (like at Del Mar Fair)
Look at these photo montages. Try to make your own photo montage using all the skills that you have learned in GIMP.
Be sure to experiment with layers and also opacity.
Be sure to experiment with layers and also opacity.


Project #7 I'm an Angel
Use all the skills you know in GIMP to make yourself an Angel.
Project #8 Laser Eyes
In this project you will create a laser eyes effect. In this project you will have a red outline, however you may use green, blue or purple.
Follow the instructions listed on each slide.
Follow the instructions listed on each slide.
